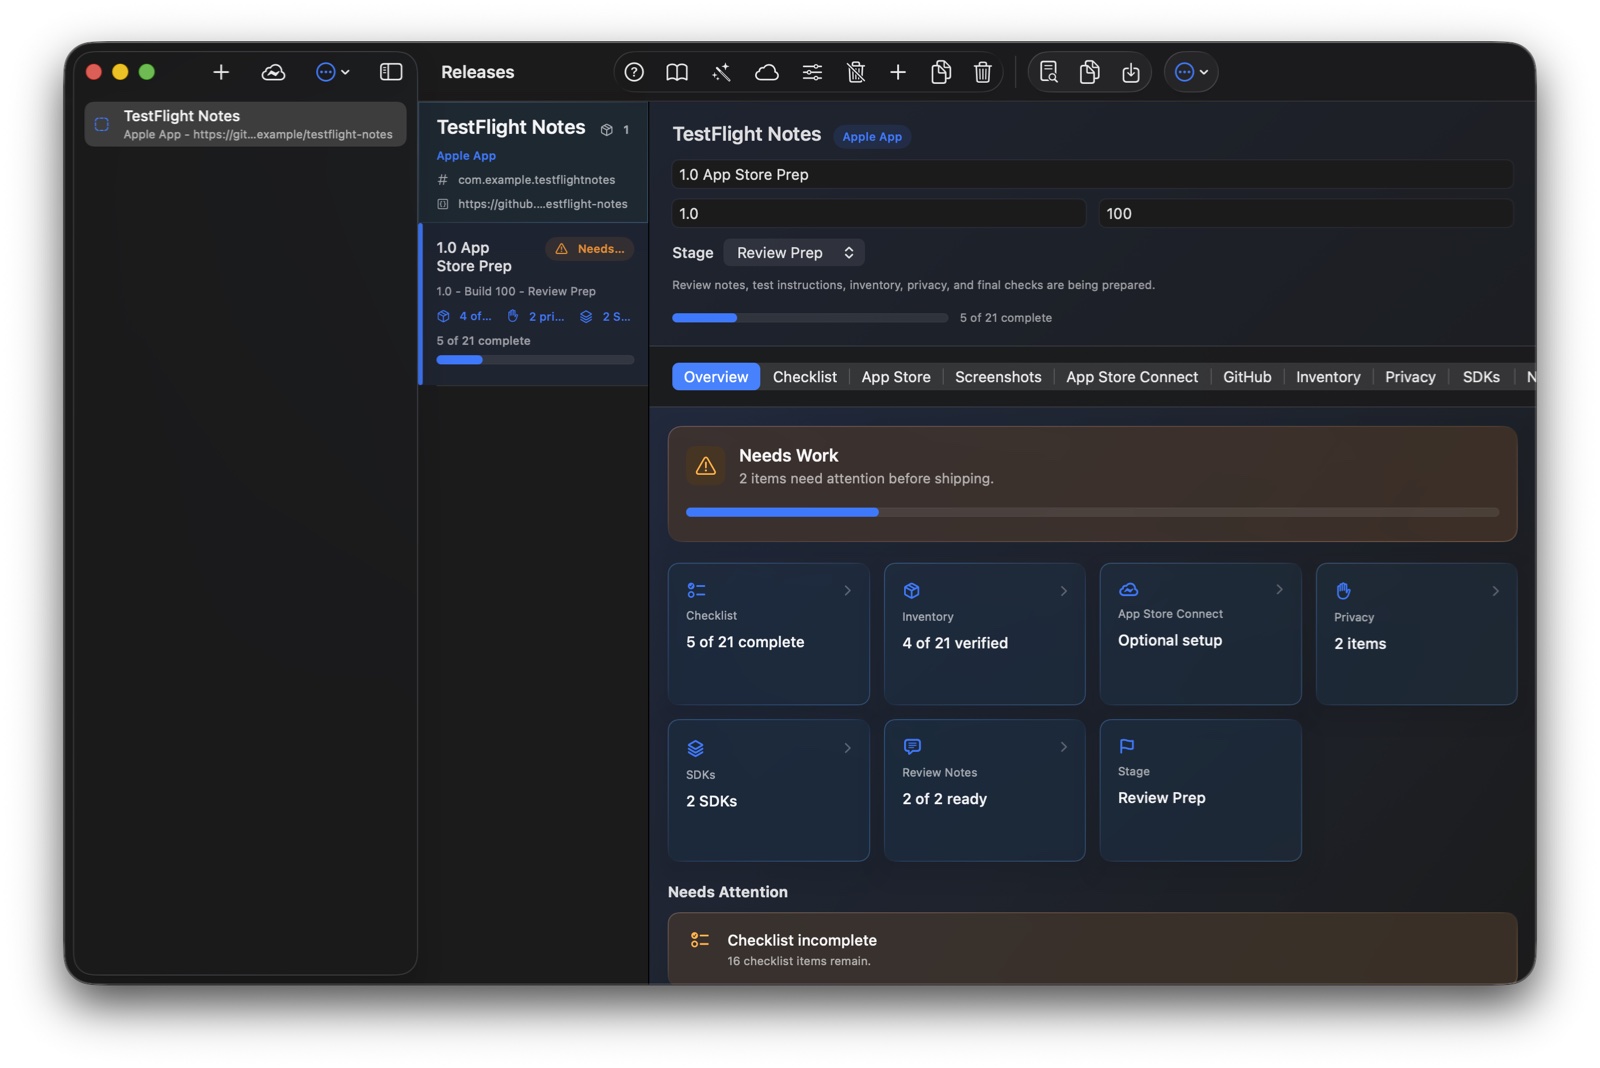
Project sidebar
Select the project you want to work on. This is also where you start New Project, Import App Store Connect, Setup Wizard, and Sync Status.
User Guide
The Apple versions keep project facts, release tasks, inventory, screenshots, privacy review, App Store Connect data, GitHub release context, CloudKit sync checks, and release packet notes in one native workspace. The Android companion opens and reviews schema-versioned release packets exported from Apple.
Start here
Use this order when setting up a release from scratch. It keeps the binder useful without forcing you to complete every tab before you have the basic shape of the release.
Apple to Android
In public Android 1.0, Save Packet keeps a working copy in private app storage. The app does not yet provide a system save/share destination, so an Android edit cannot be returned to Mac, iPhone, or iPad through a normal user workflow.
When a shareable packet is available from a supported source, choose Import Release Packet on Apple. Review the project and release identity, Create/Update decisions, Local-only rows: Preserved, and packet counts before choosing Import.
JSON includes structured release facts and screenshot metadata, not stored screenshot image bytes, credentials, the SwiftData store, or SwiftData-generated CloudKit records. The public Android build does not use CloudKit.
Android companion
The Google Play version is a focused, local-only companion for schema-versioned Release Binder JSON packets. It does not reproduce the full Apple project workspace or automatically sync with iCloud.
Android files remain on the device unless you explicitly open or save them. The public Android build has no Release Binder account, custom backend, analytics, ads, AI service, or CloudKit transport.
Workspace map
The app uses a native split-view workspace. On wider screens, the project sidebar, release list, and release detail can sit side by side. On iPhone, you move through those same areas one screen at a time.
Select the project you want to work on. This is also where you start New Project, Import App Store Connect, Setup Wizard, and Sync Status.
Select a release, scan readiness badges, add a release, duplicate an existing release, or delete a release when it is no longer needed.
Open the tabs for the selected release. If no release is selected, the detail pane shows an empty state so you know to choose or create a release first.
Use the toolbar for Field Guide, Release Readiness, Setup Wizard, Sync Status, Project Settings, Add Release, Duplicate Release, and Delete Release.
Toolbar sheets
Toolbar utilities are short-lived sheets or helper windows. Use them when you need setup help, project-wide settings, readiness detail, or current sync context without leaving the release you are working on.
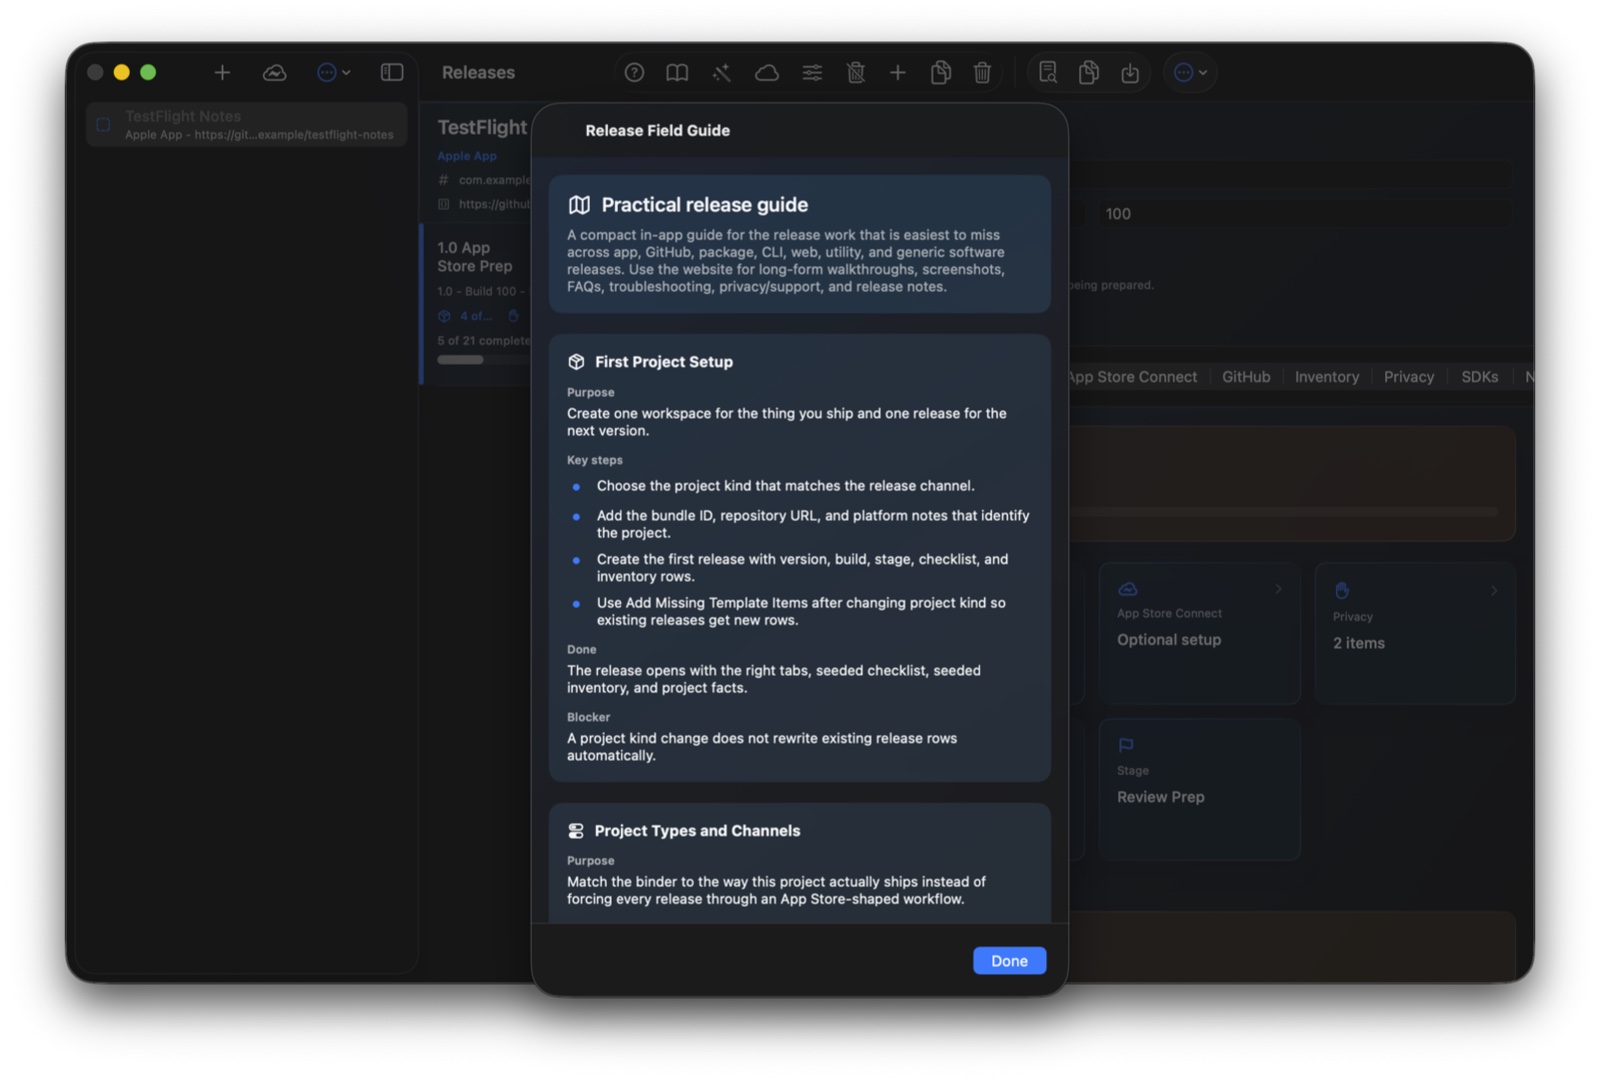
Use it: Open the book icon when you need a quick reminder inside the app.
Done state: You know which tab or sheet to open next.
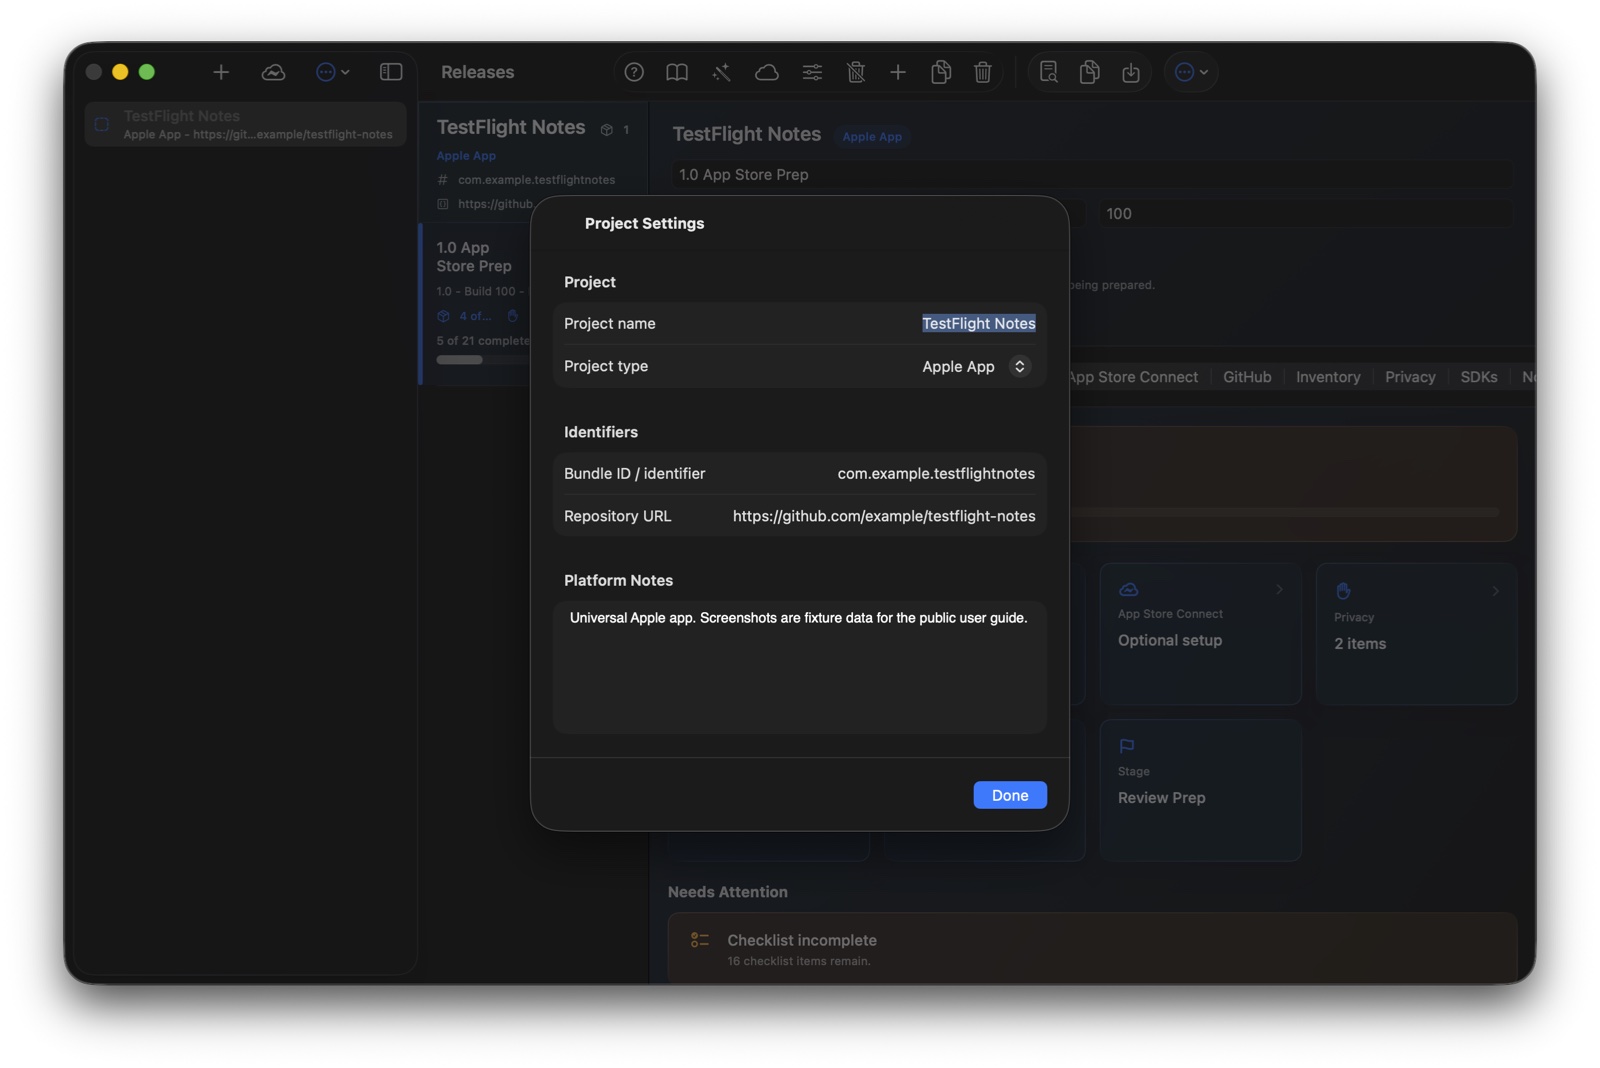
Use it: Edit the project name, project type, bundle ID or identifier, repository URL, and platform notes.
Done state: New releases seed the right checklist and inventory templates.
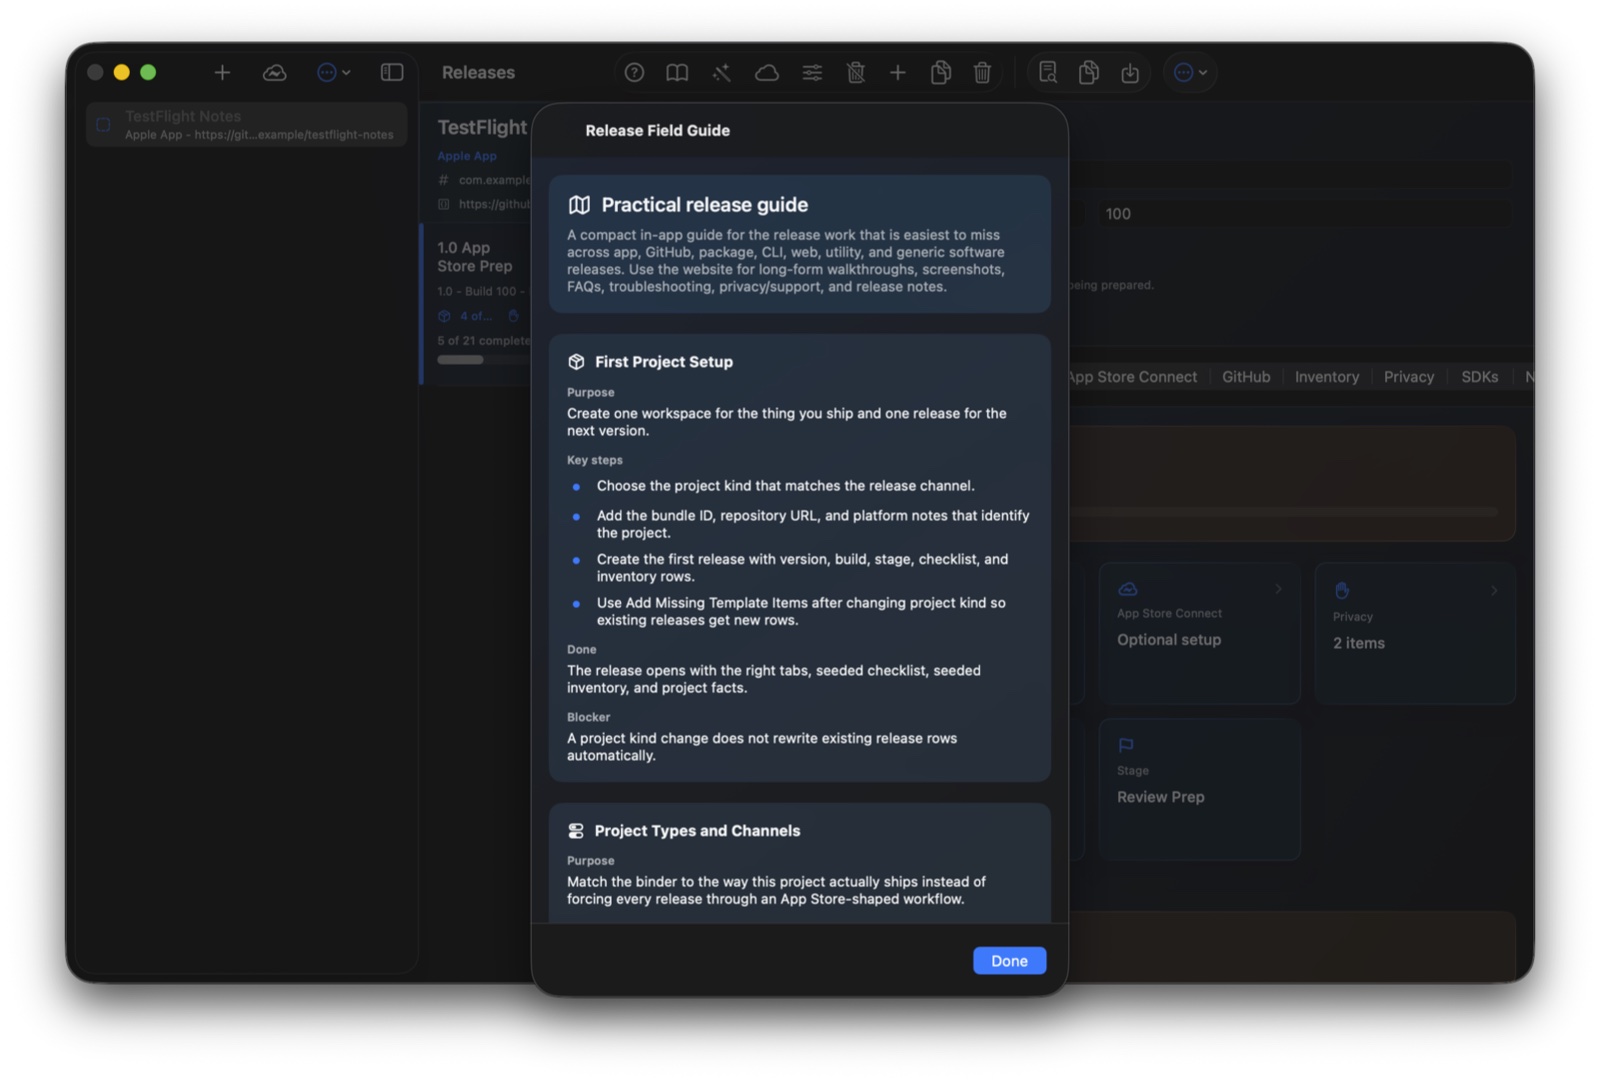
Use it: Open the question-mark icon when the release list says Needs Work.
Done state: You can trace each blocker back to a tab and resolve it there.
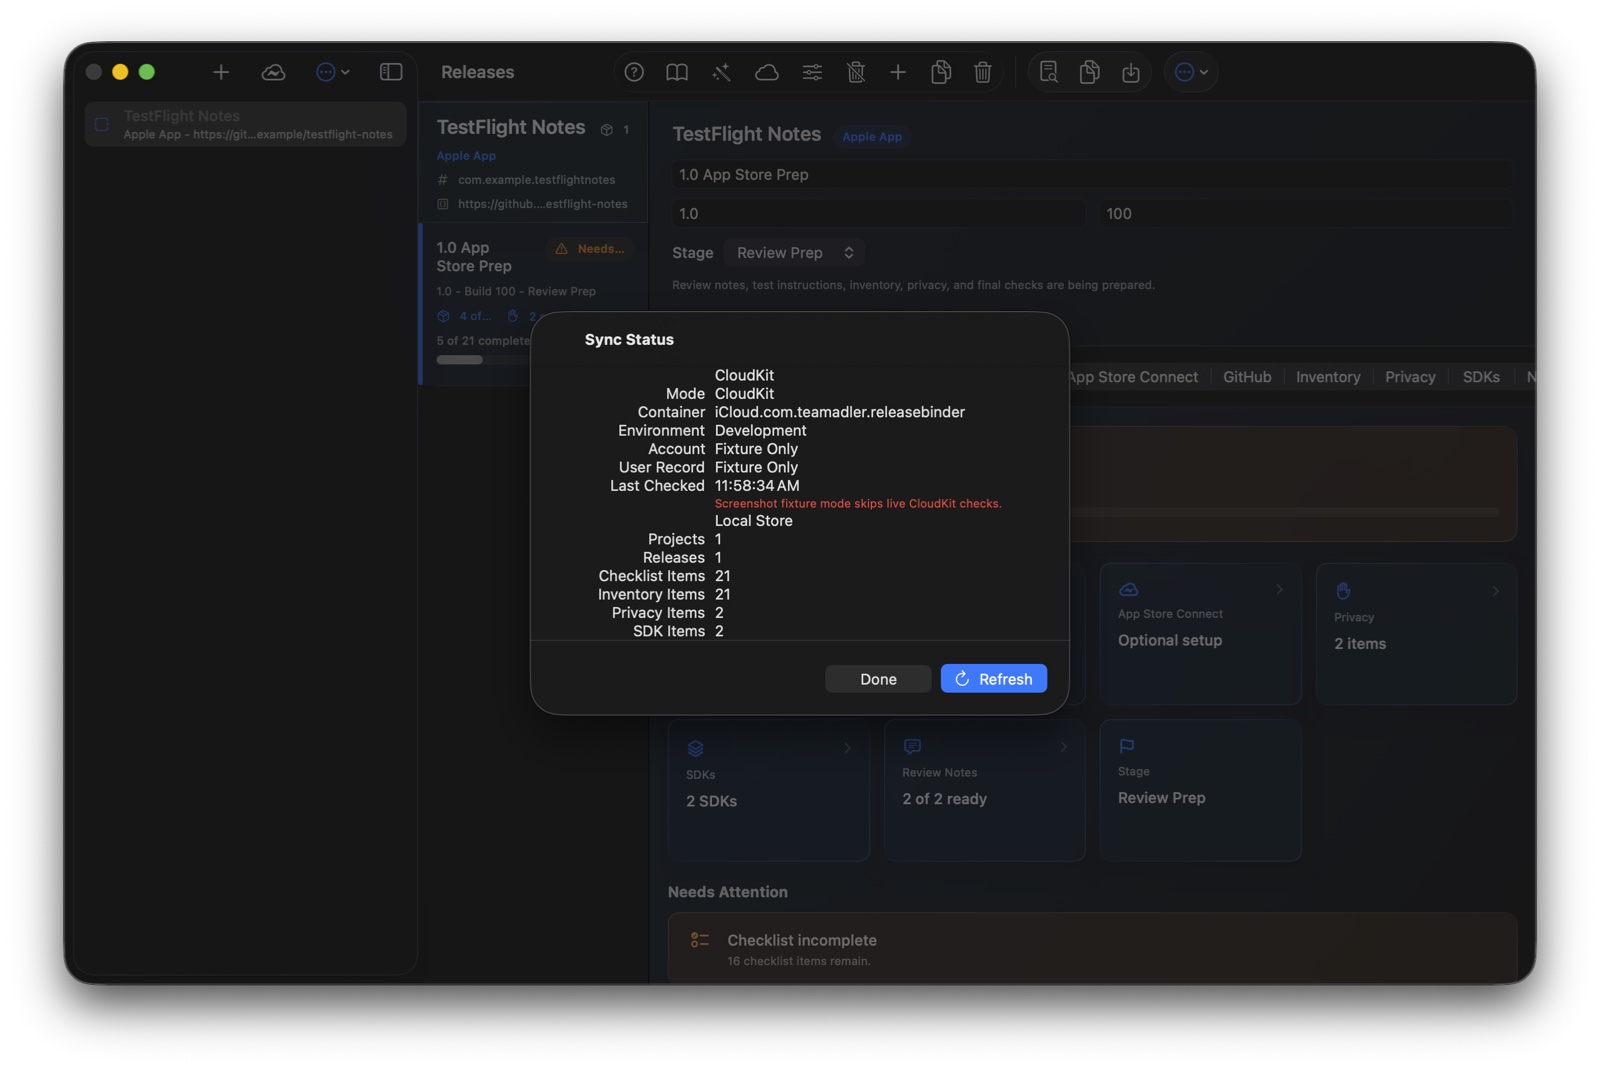
Use it: Check local record counts, CloudKit container notes, and schema reminders before device smoke tests.
Done state: You have confirmed sync expectations before testing on another device.
Project setup
A project is the thing you ship: an App Store app, Mac utility, command-line tool, package, web product, GitHub release, or generic software release. Project settings provide the facts that every release under that project inherits.
Release channels
Project type is the fastest way to keep Release Binder from becoming an App Store-only checklist. Choose the closest channel for how the work actually ships; it drives templates, visible fields, readiness checks, labels, links, and export sections.
What changes by type
Every project type still gets Overview, Checklist, Screenshots, Inventory, Privacy, Dependencies, and Notes. The difference is the language, seeded checklist/inventory rows, readiness blockers, and the release-channel tab fields.
Use when: The release goes through App Store Connect, TestFlight, App Review, or Apple-platform review prep.
Project setup: Use Bundle ID / identifier, Repository URL when one exists, and platform notes for supported Apple platforms, iCloud container, distribution constraints, or review-sensitive behavior.
Release tabs: App Store, App Store Connect, Screenshots, Privacy, SDKs, Inventory, Checklist, Notes, and GitHub when repository release notes or source links matter.
Readiness focuses on: Version/build, App Store metadata, App Store Connect linkage, screenshots, privacy/data-use rows, SDK review, CloudKit schema, entitlements, review notes, and test-account instructions.
Use when: The release is a GitHub tag, GitHub Release, source artifact, or repository milestone.
Project setup: Add the repository URL. Release Binder recognizes common GitHub web and SSH remotes and builds Repository, Releases, Actions, Milestones, Compare Tags, and Open Draft Release links without storing a GitHub token.
Release tab: The GitHub tab shows Previous tag, Tag, Target branch, Milestone, Release title, Changelog / release notes, Breaking changes, Migration notes, Assets and artifacts, CI status, Docs updated, Announcement copy, Rollback notes, and Post-release verification.
Actions: Open Repository, Releases, Actions, Milestones, Compare Tags, Open Draft Release, and Copy Release Body.
Use when: You are shipping a Swift package, reusable module, package-registry release, internal library, or versioned dependency.
Project setup: Use Package ID plus Repository or package URL. Platform notes should capture supported platforms, compatibility policy, registry target, or package-manager expectations.
Release tab: The Package tab uses Package version, Package build, Release branch, Registry target, Changelog / compatibility notes, Package artifacts and registry notes, CI / package test status, Docs, examples, and upgrade guide, and Rollback / yanked-version notes.
Readiness focuses on: Compatibility notes, public API changes, package metadata, dependency/license review, registry target, docs, upgrade guide, and post-release verification.
Use when: The release is a command-line tool, developer utility, binary package, Homebrew-style artifact, or installable script/tooling release.
Project setup: Use Command or package ID plus Repository or package URL. Platform notes should capture supported shells, OS targets, runtime requirements, and install channels.
Release tab: The CLI tab uses CLI version, Build / artifact, Release branch, Distribution target, Changelog / install notes, Binaries, packages, and checksums, CI / lint / test status, README, command help, and install docs, and Rollback / previous-version notes.
Readiness focuses on: Install and upgrade instructions, binary artifacts, checksums, supported platforms, runtime dependencies, package-manager metadata, and command help.
Use when: The release is a web app, SaaS deployment, docs site, marketing site, backend deployment, or customer-facing rollout.
Project setup: Use Domain / service ID plus Repository or deployment URL. Platform notes should capture hosting target, environment names, migration constraints, or release-window notes.
Release tab: The Web tab uses Version / rollout, Deployment ref, Deployment branch, Deployment target, Changelog / customer-facing notes, Deployment, migrations, and artifacts, CI / deployment status, Docs, status, and customer comms, and Rollback / redeploy notes.
Readiness focuses on: Staging smoke checks, migrations, feature flags, monitoring, backups, rollback, customer-facing notes, support/status updates, and post-release verification.
Use when: The release is a Mac utility that may ship through the Mac App Store, direct download, GitHub assets, signed installer, notarized zip, or mixed distribution.
Project setup: Use Bundle ID / identifier and Repository URL. Platform notes should capture sandboxing, automation permissions, signing/notarization requirements, helper tools, or direct-download channel details.
Release tabs: Mac Utility gets App Store and App Store Connect tabs because Mac utilities may still ship through Apple, plus the GitHub release channel for direct-download or repository artifact work.
Readiness focuses on: Build number, signing, notarization, downloads, screenshots, privacy disclosures, SDKs, App Store metadata when applicable, and rollback / previous-build notes.
Use when: The release needs a binder but does not fit the named project types yet.
Project setup: Use Identifier, Repository URL, and platform notes to explain the release channel in plain language.
Release tab: The Release tab uses Version, Build / ref, Target branch / ref, Milestone / target, Release ref / tag, Changelog / release notes, Assets, artifacts, and distribution, Build / release status, Docs and announcement target, and Rollback notes.
Readiness focuses on: Source/version clarity, artifacts, docs, risk notes, rollback plan, and post-release verification.
Release detail
The tab bar changes in two ways: some tabs appear only for App Store-style releases, and the release-channel tab changes its title and field labels based on project type.
Release selection
Each release row is a compact status report. Use it to decide what needs attention before opening the full detail view.
The version, beta name, deployment name, or milestone you are preparing.
Shows where the release is in the workflow, such as Planning, TestFlight, App Review, Ready, Shipped, or Archived.
Highlights whether the release still needs work. Open the release or readiness sheet to see the blockers.
Summarizes verified inventory, privacy/data-use rows, SDK/dependency count, and checklist completion.
Release detail
Tabs keep the release packet organized by job. You do not need to complete them in order, but a ready release should have each required area filled or intentionally marked not applicable.
Purpose: Track the release summary, readiness status, important counts, and high-level facts.
Use it: Confirm name, version, build, stage, date targets, and current release health.
Done state: Someone can understand what is shipping and whether the release is blocked.
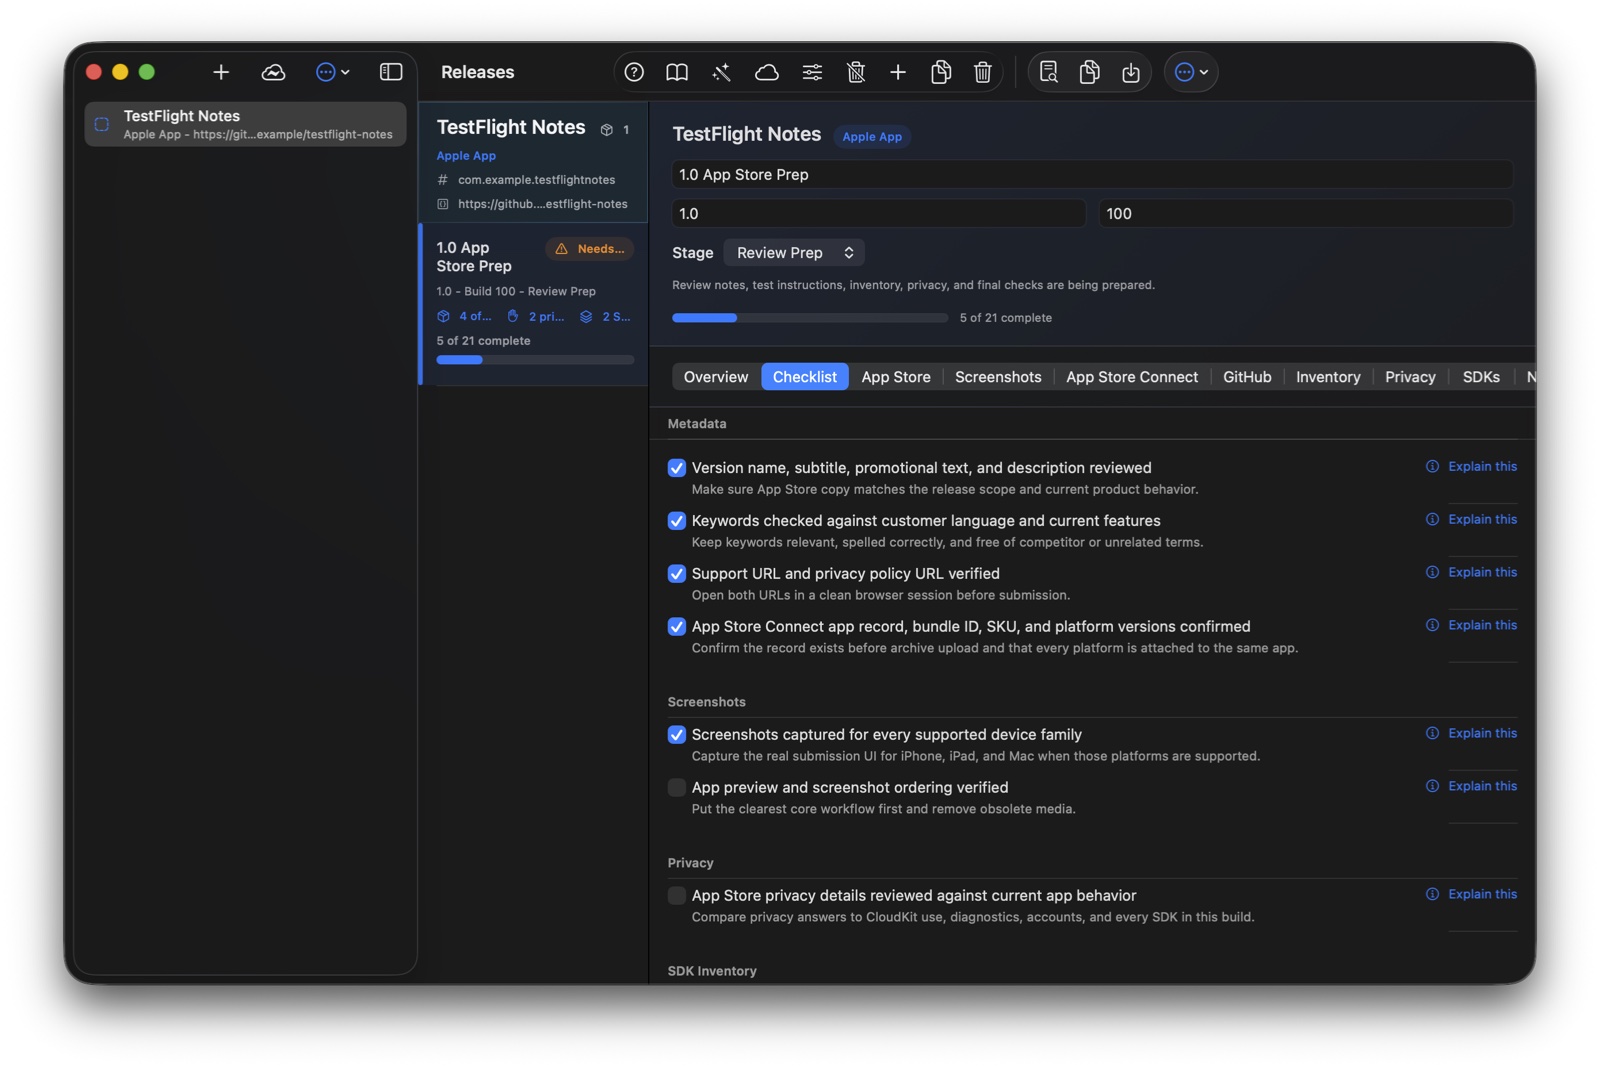
Purpose: Track concrete release tasks such as screenshots, metadata, privacy review, QA, archive, and submission steps.
Use it: Mark items complete as work is verified. Add missing template items after changing project kind.
Done state: Required tasks are complete or intentionally marked not applicable.
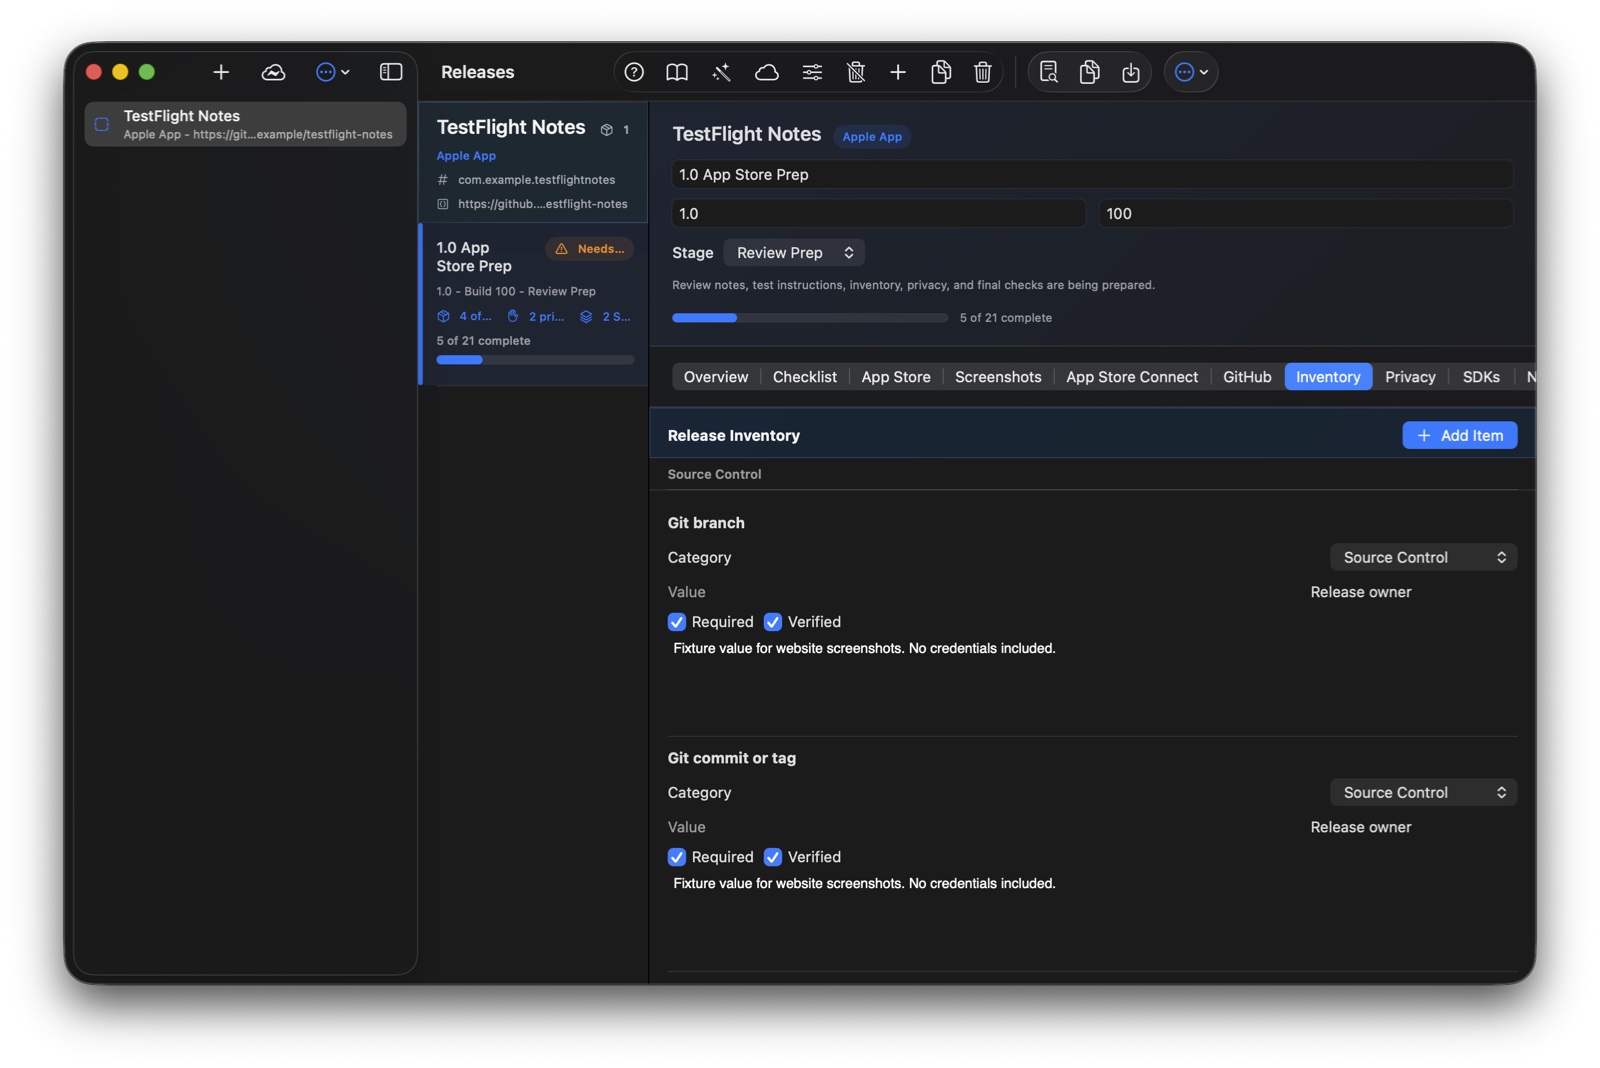
Purpose: Record release facts that must be verified, such as source ref, build environment, App Store record, CloudKit status, and rollback plan.
Use it: Fill the value, verify it, and leave non-secret notes when the value needs context.
Done state: Required inventory rows are filled and verified.
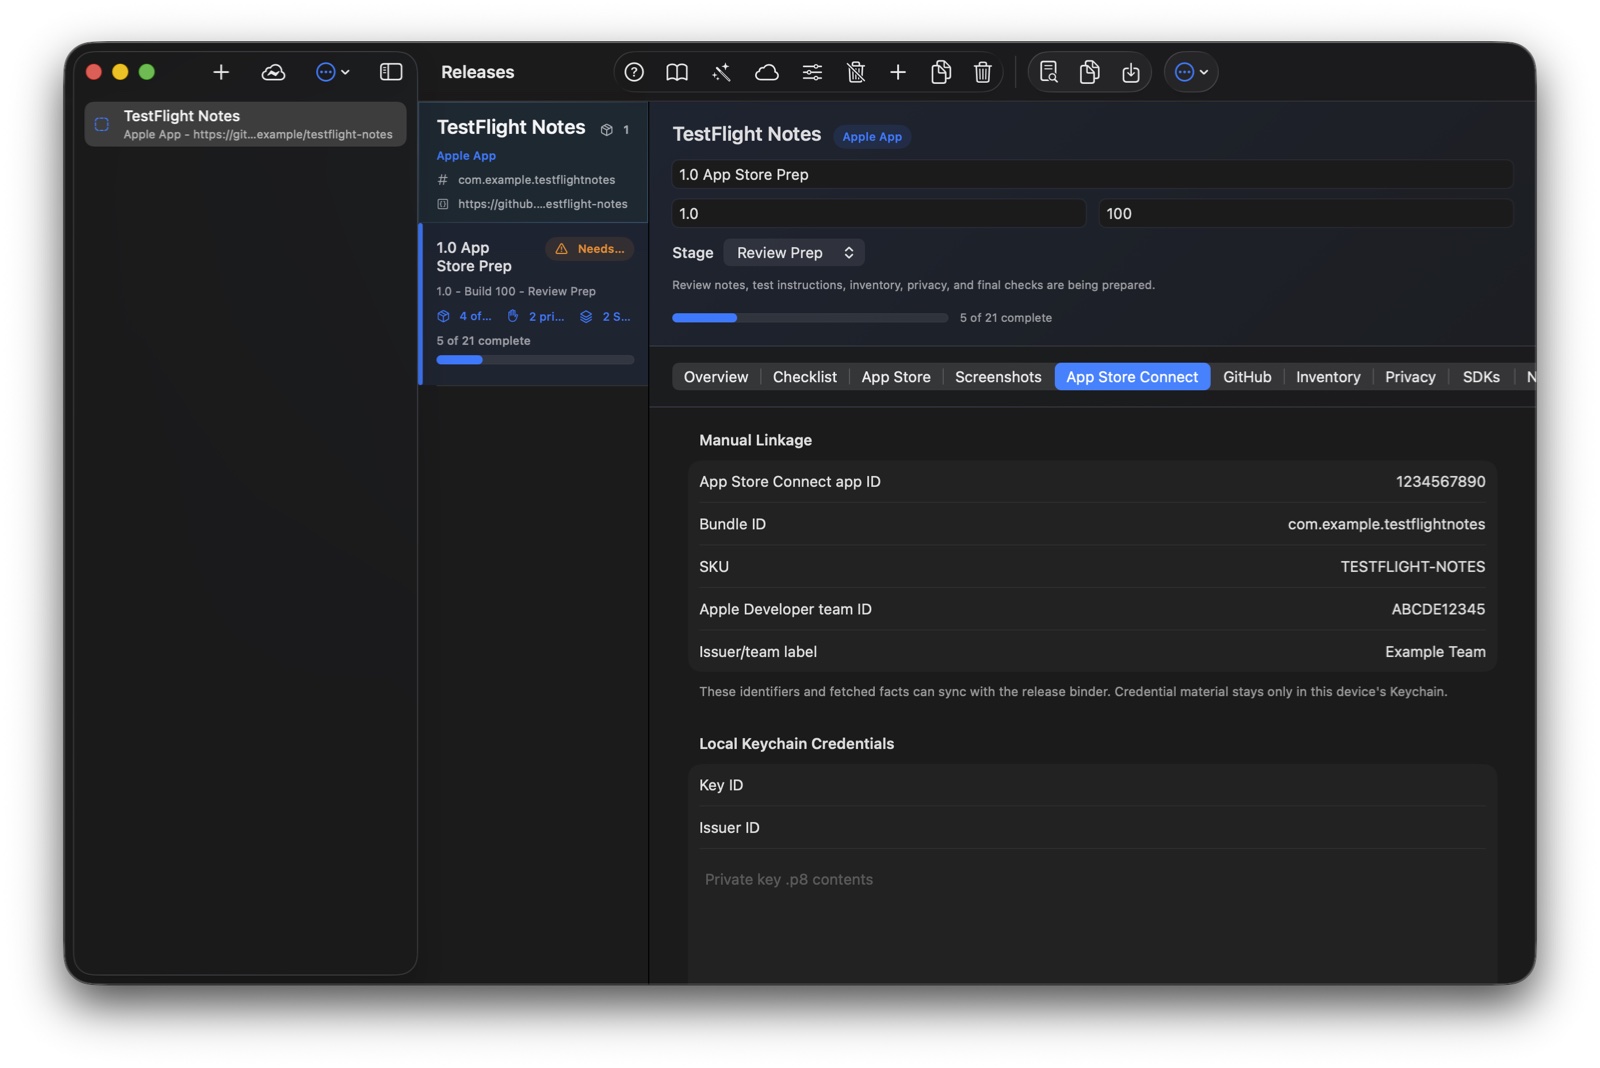
Purpose: Link a release to App Store Connect, fetch facts, apply safe values into the binder, and push selected listing metadata back after preview.
Use it: Add app ID or bundle ID, Team ID, issuer label, and local Keychain credentials when fetching or pushing metadata.
Done state: Fetched facts match the app, safe values have been previewed before applying, and selected listing fields are current in App Store Connect.
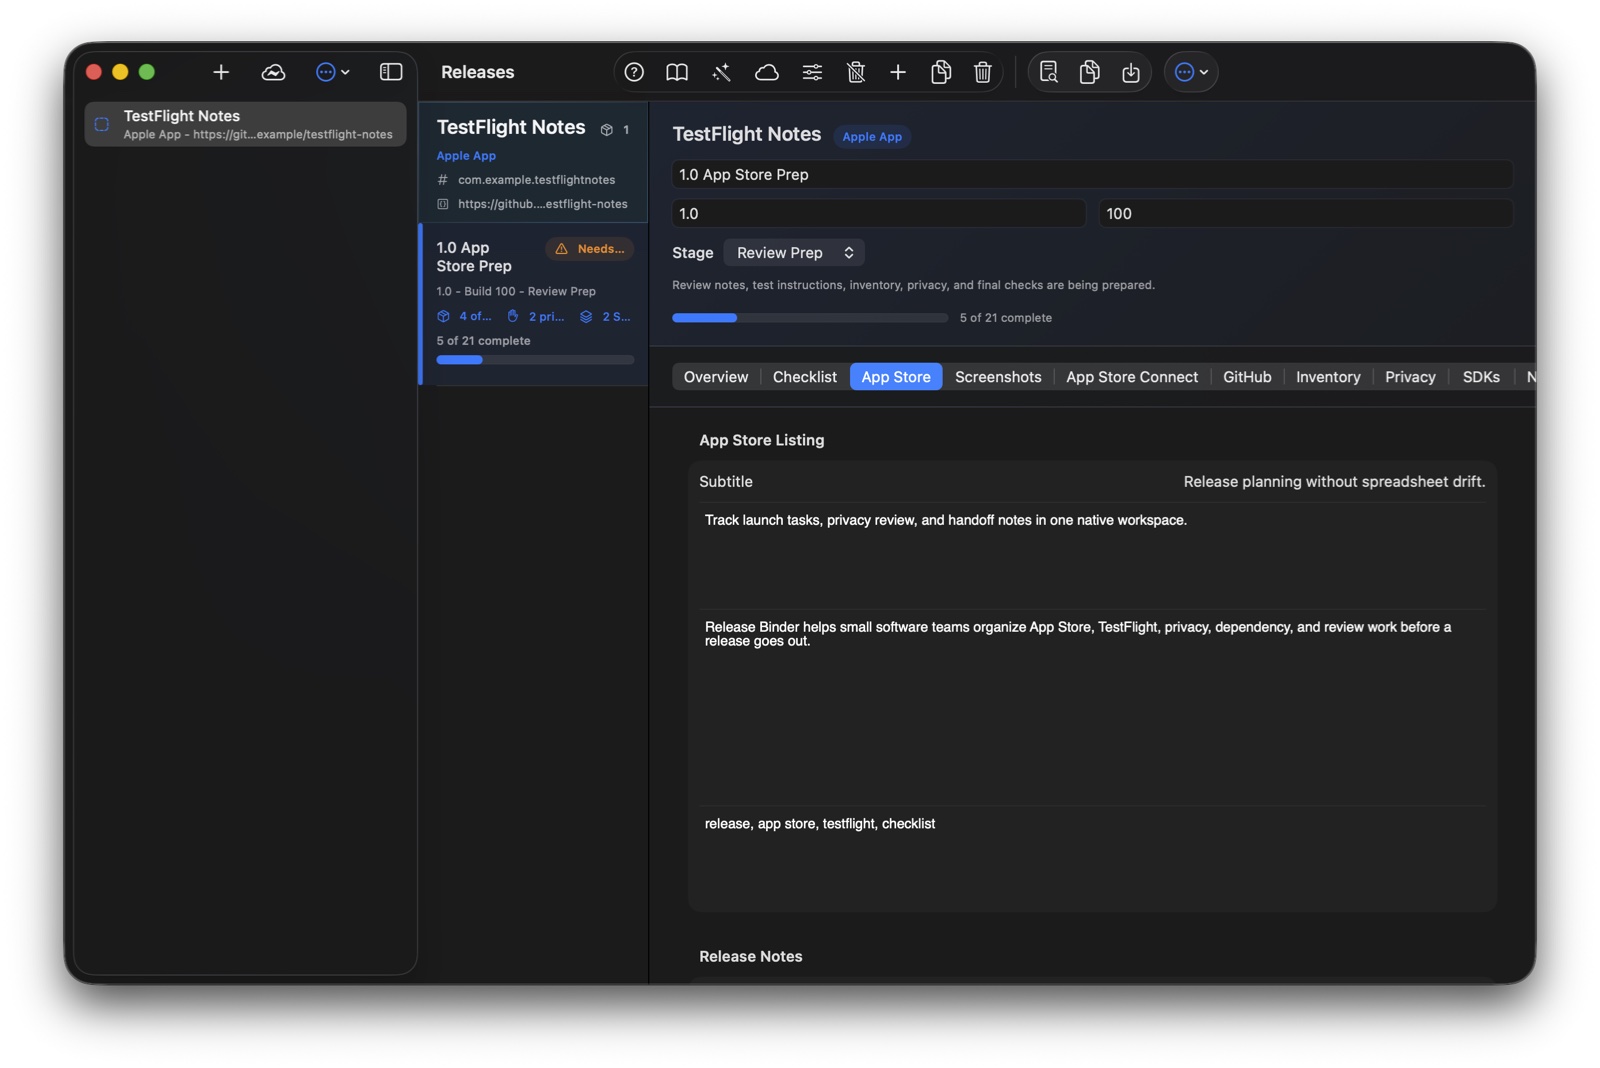
Purpose: Draft App Store metadata or release-channel copy such as changelog, review notes, URLs, and announcement text.
Use it: Keep public-facing copy and reviewer context here. Keep passwords, tokens, and private keys out.
Done state: App Store metadata is current, reviewed, and safe to export.
Purpose: Prepare repository releases with tag, previous tag, target branch, milestone, changelog, artifacts, CI status, docs, rollback, and verification notes.
Use it: Add the repository URL and release fields, open Repository/Releases/Actions/Milestones/Compare links, then copy the GitHub release body when it is ready for a draft release.
Done state: The release has enough tag, comparison, CI, artifact, changelog, and verification context to publish or hand off.
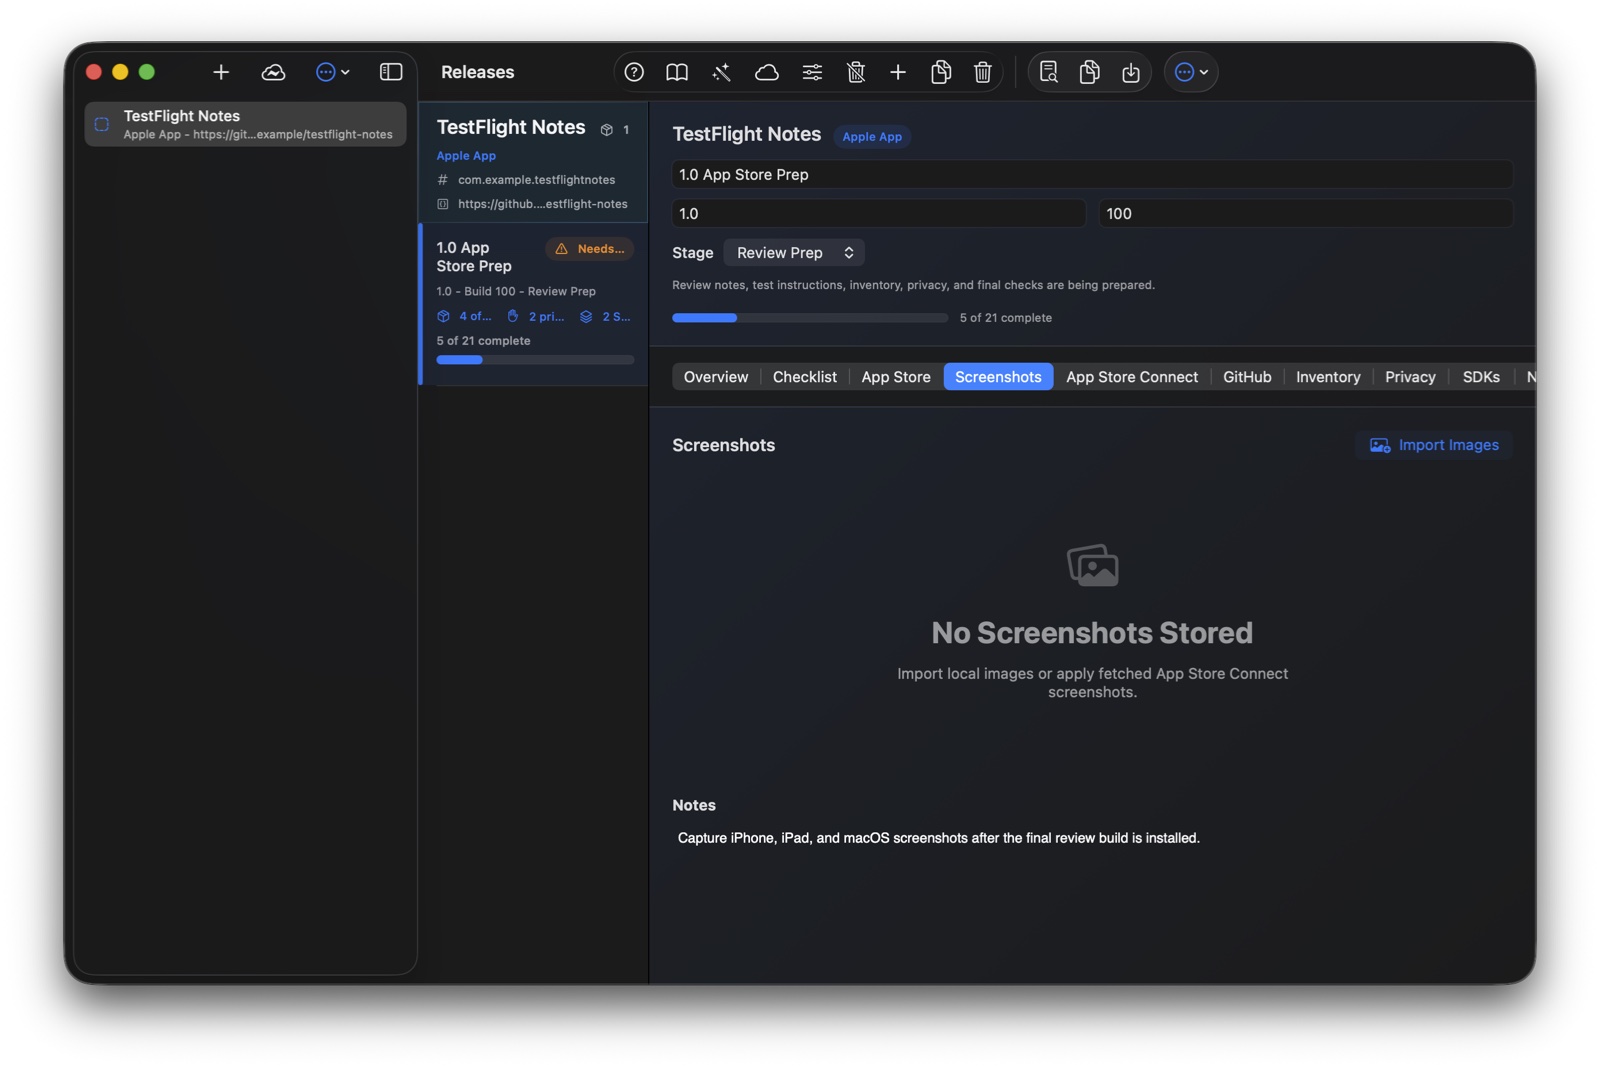
Purpose: Store the screenshots that belong to this release instead of tracking them only in Finder or App Store Connect.
Use it: Import local images, apply fetched App Store Connect screenshots, label platform/display/locale, and click an image to preview it larger.
Done state: Required screenshots are present, named, reviewed, and synced with the release record.
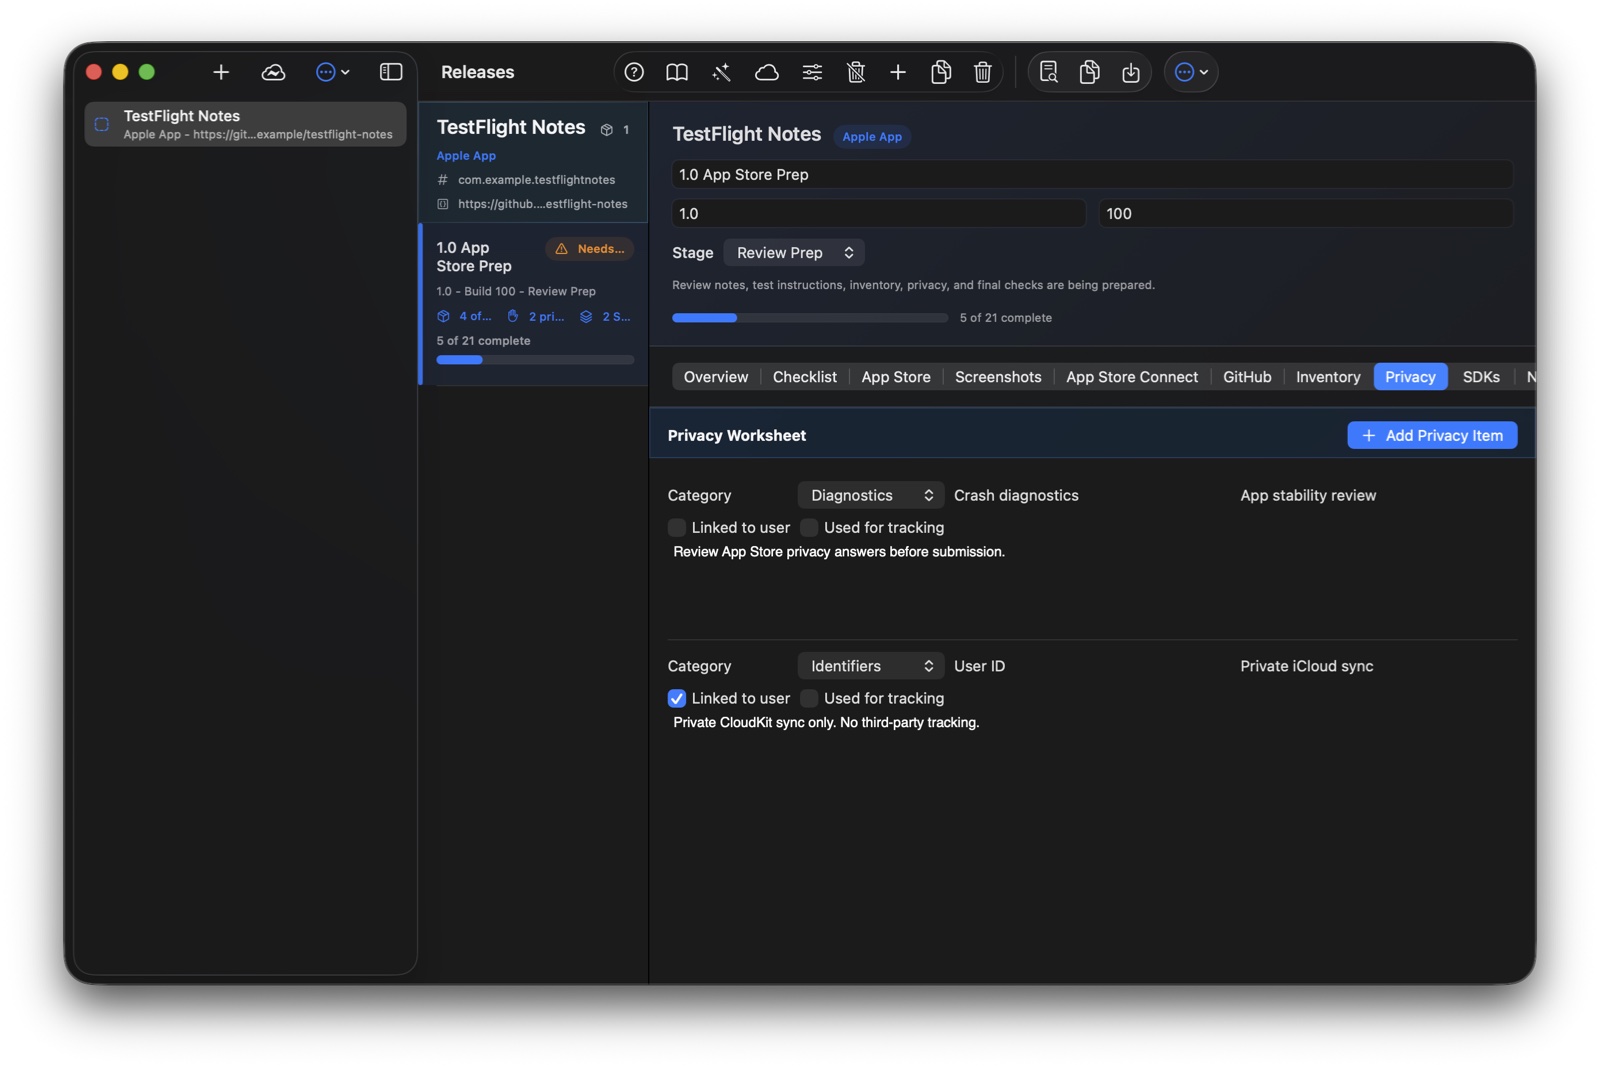
Purpose: Capture data types, privacy labels, tracking behavior, analytics, cookies, and policy URLs.
Use it: Update rows whenever app behavior, SDKs, or service providers change.
Done state: Privacy notes reflect the shipped behavior and are ready for review.
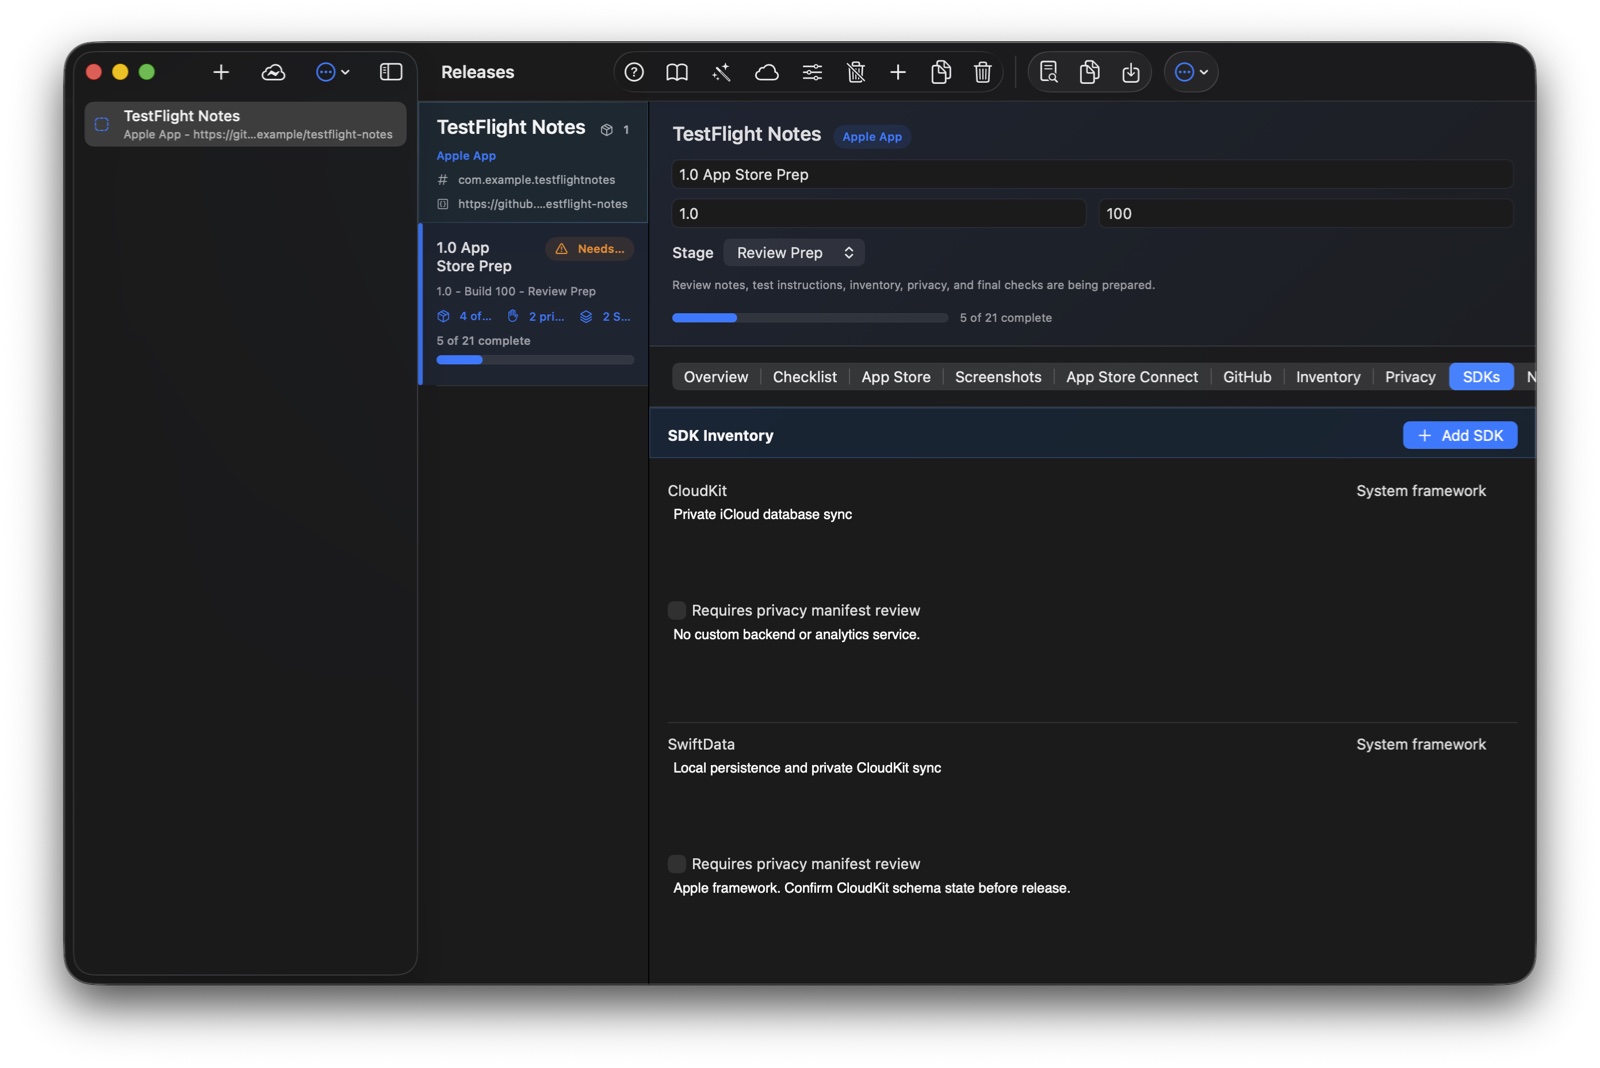
Purpose: Track SDKs, packages, services, runtime components, versions, privacy manifests, and data-use notes.
Use it: Review changes before submission or deployment, especially when dependency behavior affects privacy.
Done state: Dependencies are current and any privacy or review impact is documented.
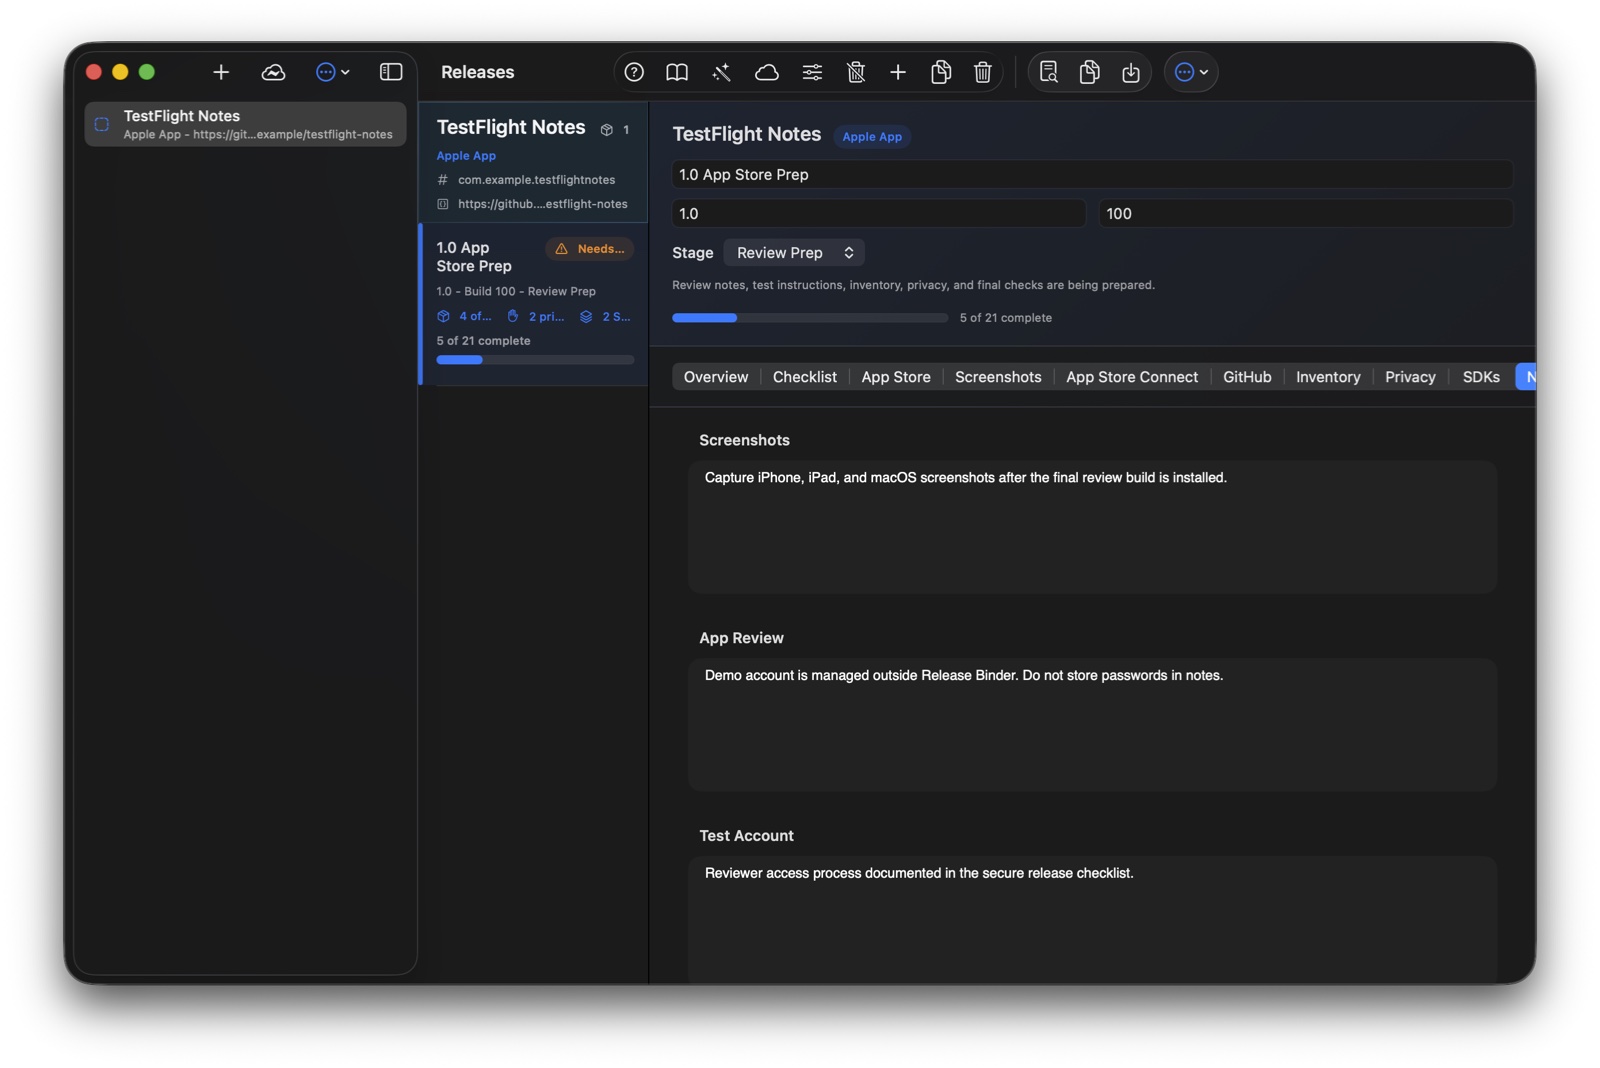
Purpose: Keep reviewer instructions, QA context, rollout notes, rollback notes, and post-release verification.
Use it: Write the process, not the secret. Refer to secure credential locations without pasting credential values.
Done state: The notes help someone review or ship the release without exposing sensitive data.
Release gate
Readiness is a working signal, not a magic approval. It looks across release basics, checklist progress, required inventory, privacy/data-use rows, dependencies, reviewer notes, and channel-specific fields.
Find the missing pieces that would slow down TestFlight, App Review, package publication, GitHub release, or deployment.
Open Release Readiness, review blockers and warnings, fix the source tab, then re-check the badge.
Blocking items are resolved, required inventory is verified, and the exported packet has enough context for final review.
Inventory has values but was never marked verified, so readiness still treats the row as unfinished.
Walkthrough
Import creates a Release Binder project from App Store Connect facts. It is useful when the app already exists in App Store Connect and you want the binder to start with the correct app record, bundle ID, SKU, platform versions, latest builds, privacy policy URL, listing context, and screenshots already uploaded to the app version.
Use App Store Connect credential material only in the local import form or Keychain-backed credential form. Never paste private keys, JWTs, authorization headers, passwords, API keys, or tokens into binder notes, exported Markdown, docs, support tickets, screenshots, tests, or source files.
.p8.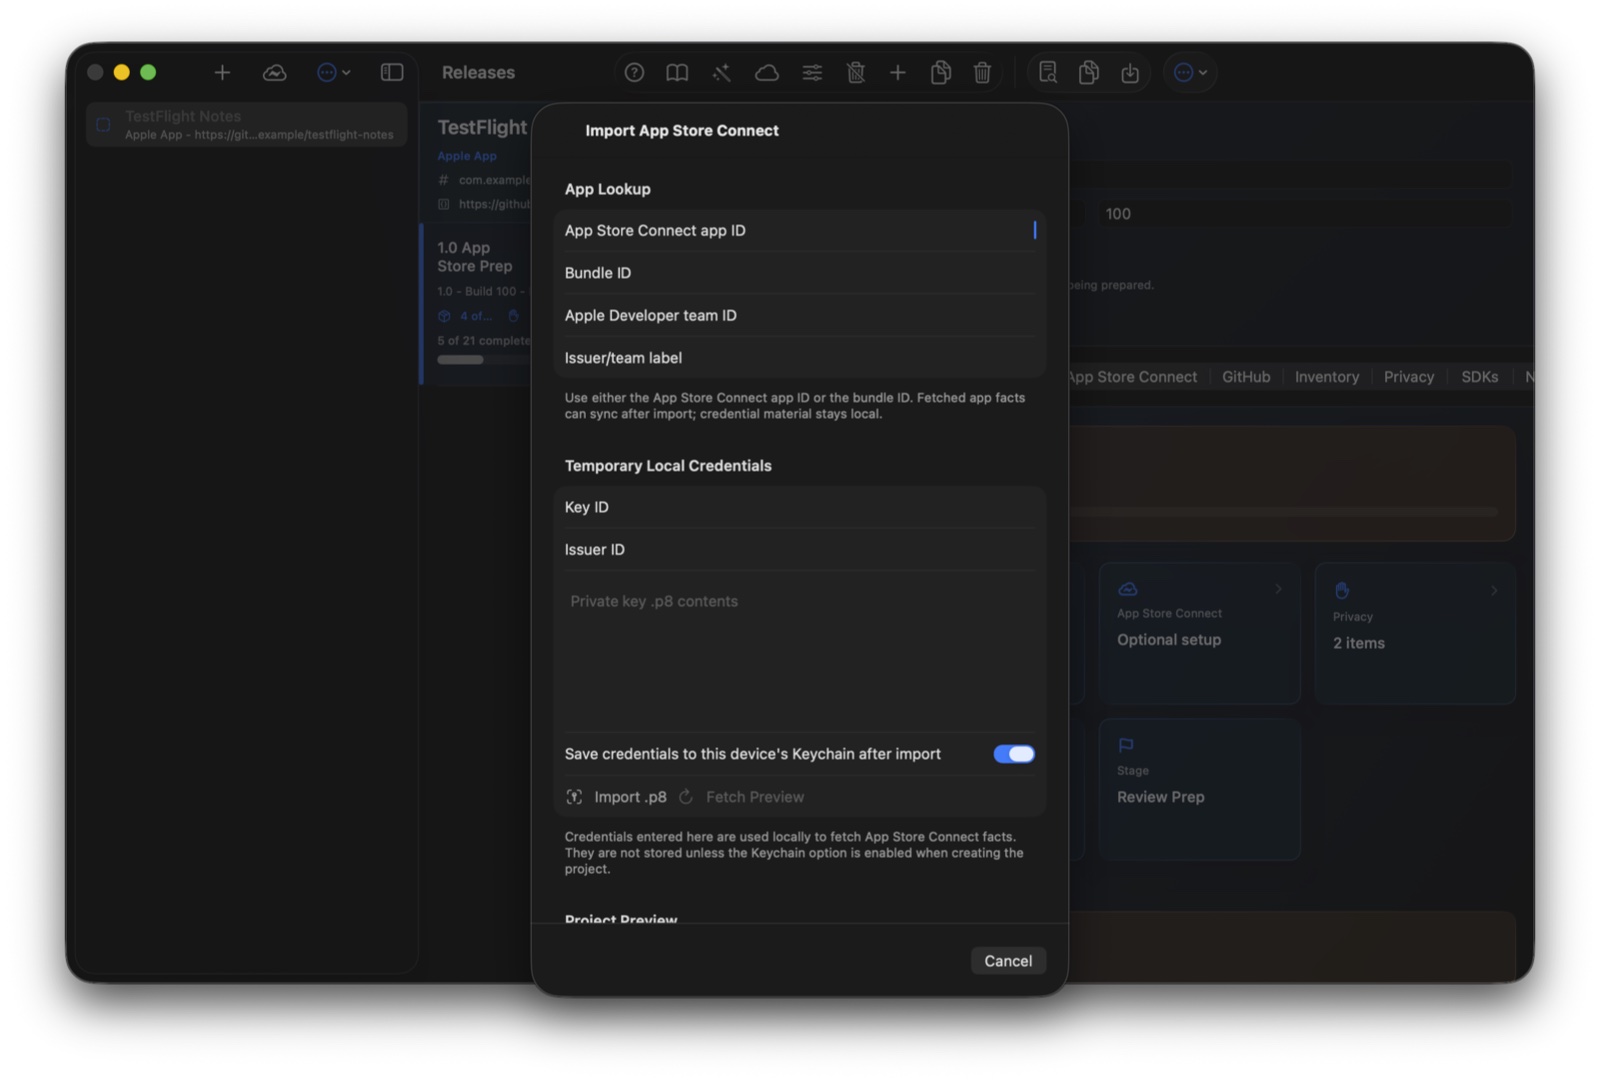
.p8 file somewhere secure outside the repository. Do not paste the private key into notes, docs, Markdown exports, support tickets, screenshots, or tests.
.p8 file or paste its contents into the local-only credential field for this fetch.
Release tab
After a project exists, use the release-level App Store Connect tab to refresh facts, apply safe values into the binder, and push selected App Store metadata back to each current platform version localization. Applying updates binder fields only. Push writes only the previewed listing fields; it does not upload assets, assign testers, change groups, create app records, or submit for review.
Stores non-secret identifiers such as app ID, bundle ID, SKU, Apple Developer Team ID, and issuer/team label.
Lets this device fetch App Store Connect facts and push selected metadata. Use Save Credentials only when the device should keep refreshing or writing through App Store Connect.
Shows selected app, primary bundle ID, platform versions, latest builds, listing locale, privacy policy URL, screenshot import details, and last fetch time.
Review every proposed binder change before applying. Safe apply fills blank metadata fields and updates App Store Connect-derived inventory rows.
Review binder values against current App Store Connect values before writing promotional text, description, keywords, release notes, support URL, or marketing URL.
Fetch can use a Developer-style key. Push requires an App Store Connect role that includes Edit App Store details, which Apple describes as metadata on App Information, Version Information, and privacy policy URL fields. If the key can fetch but push returns HTTP 403, create a narrower metadata-writing key instead of defaulting to Admin unless your team policy allows it.
Release tab
The Screenshots tab stores image assets for the selected release. Use it for App Store screenshots, review evidence, product-page work, or any visual that should travel with the release packet.
Add one or more local image files. Release Binder stores the image data, title, file name, dimensions, source, and sort order with the release.
When fetched App Store Connect facts include screenshot delivery URLs, Preview Apply can import those images into the same tab. Applying does not upload, delete, reorder, or submit anything in App Store Connect.
Use title, display type, platform, locale, and per-image notes to explain which device size, storefront, or review purpose each image serves.
Click a screenshot to inspect it larger. Stored screenshots sync through the user's private CloudKit account after the Production schema includes the screenshot asset fields.
Sync readiness
Release Binder uses SwiftData with private CloudKit. Signed TestFlight and App Store builds use the Production CloudKit schema, so Production must be promoted after model, project type, GitHub release-channel, screenshot, or App Store Connect field changes.
Keep projects and releases available across Mac, iPhone, and iPad for the same iCloud account.
Confirm the signing team, bundle ID, iCloud container, and App Store Connect app match. Exercise the current model in a signed build, then promote CloudKit schema changes to Production.
A small project and release created on one device appears on the other devices, and edits sync both directions.
Development schema contains new fields, but Production does not. For each review candidate, verify Production includes project kind/repository fields, App Store Connect linkage fields, screenshot asset fields, and the release-channel previous tag field before relying on App Store or TestFlight sync.
Review packet
Preview and export actions create a release packet from the current binder content. Use them for final review, archive, handoff, release notes prep, or an external publishing workflow.
Use Preview Packet before sharing, Copy Packet for a quick handoff, Export Markdown for an archive file, or Copy GitHub Release Body when you are pasting into a draft GitHub release. Before sharing an export, review the source binder fields. If sensitive content appears, remove it from the binder, regenerate the export, and rotate the exposed credential if needed.
Safety
Release Binder is not a password manager and is not a place to store private keys. Keep the binder useful by recording process and release context, not credential values.
Fix the common blockers
In App Store Connect, open Users and Access, then Integrations. The Account Holder may need to request API access before Team Keys can be created.
Check that the app ID or bundle ID is correct and that the API key belongs to the same Apple Developer team as the app record.
Confirm the Issuer ID, Key ID, Team ID, and role. Use the lowest role that can read the required app, version, and build facts; increase only if App Store Connect denies read access.
The key can authenticate, but its role cannot edit the requested App Store metadata. Use a key with Edit App Store details for push. Admin works, but a narrower metadata-writing role is preferred when available.
Check Production CloudKit schema first. After SwiftData, screenshot, GitHub release-channel, or App Store Connect field changes, Production must include the current fields before TestFlight or App Store builds can upload and sync those records.
Open Inventory and verify required rows after confirming their values. Empty or unverified required rows are treated as blocking work.
Check Project Settings and confirm the project kind. Existing releases keep existing rows until you use Add Missing Template Items.
Remove that content from the binder source field, regenerate the export, and rotate any exposed credential if needed.